Role Assignment Service – Management of an Application Role
Note: The Role Assignment Service allows you to add, modify, and delete application roles for AMS users. If you do not yet have permission to perform role assignment services in AMS, you will need to complete the AMS Administrator Role Request Form for submission to IAMAMSPMO@hhs.gov for assignment. During an active AMS session (i.e., after logging into AMS), retrieve the form by clicking on the "Help" button on your homepage or directly copying this link into your navigation bar: https://ams.hhs.gov/amsApp/help/HelpIndex.html.
Note: If you are an OpDiv Role Assigner, you are able to perform the addition and removal of application user role(s) for users belonging to one or more designated OpDivs that you have been assigned to as part of the AMS Administrator Role Request process.
Performing role assignment tasks requires authentication with your HSPD-12 access card; if you logged into AMS by other means, you will be required to complete a second step of authentication before you can proceed with related activities.
-
Log into AMS, preferably using your HSPD-12 access card, at https://ams.hhs.gov. For quick and easy access to your applications, add this page to your browser favorites or create a desktop shortcut.
-
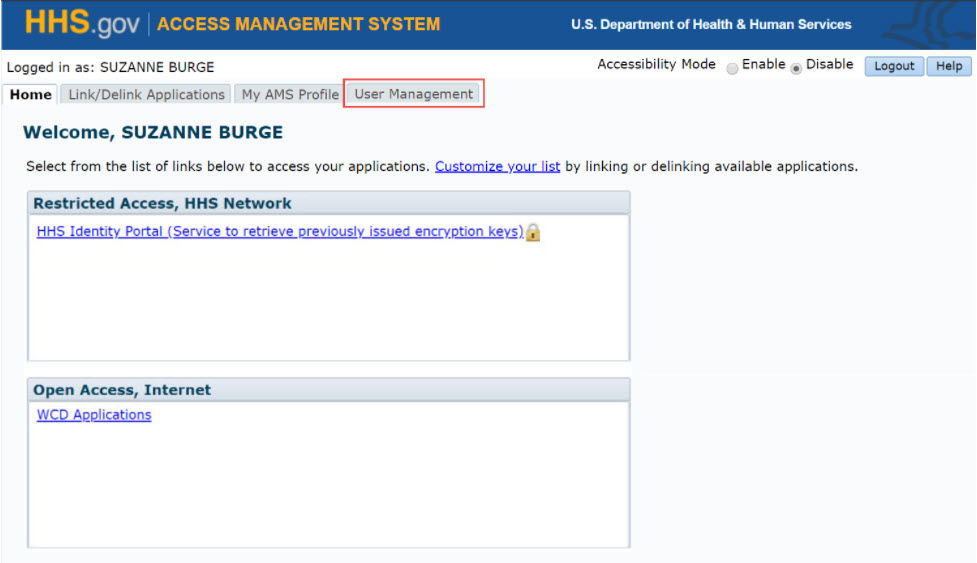
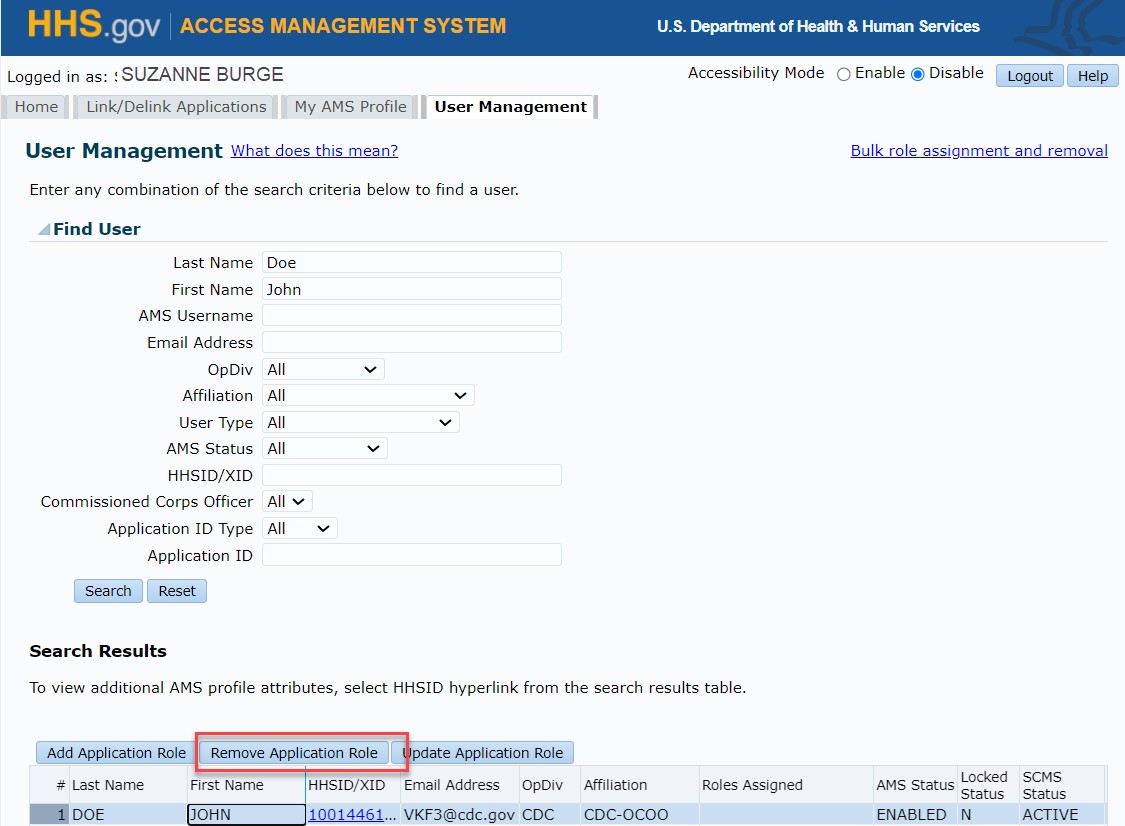
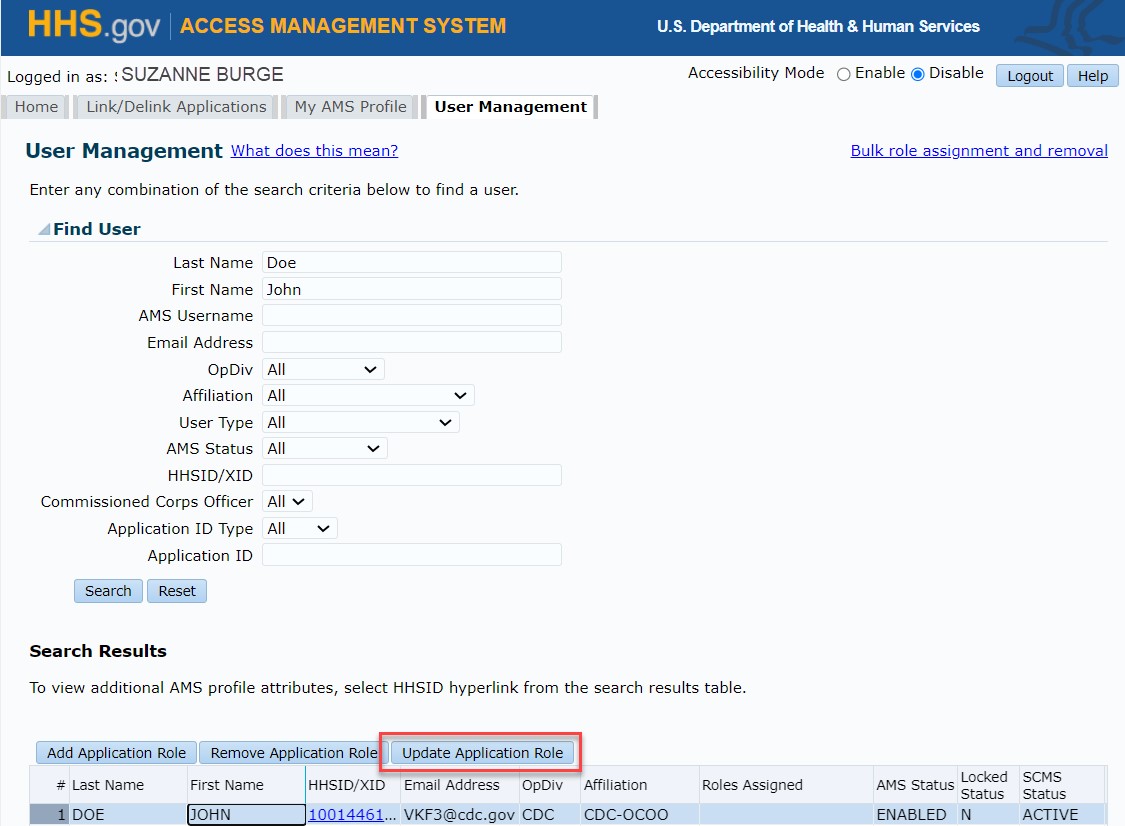
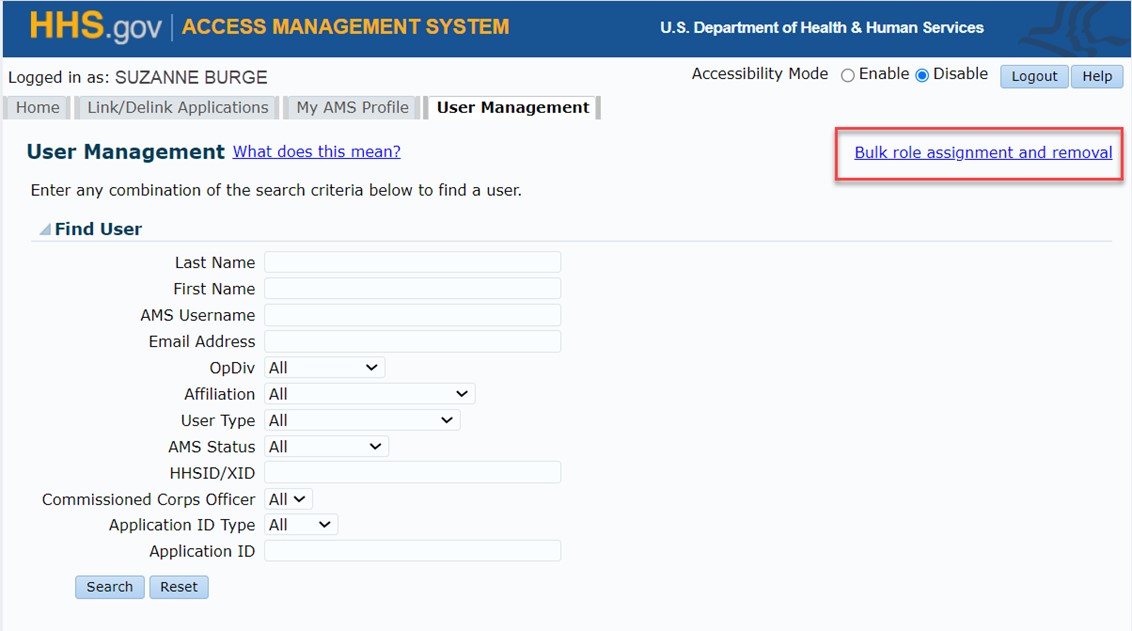
On your AMS homepage, select the "User Management" tab.
-
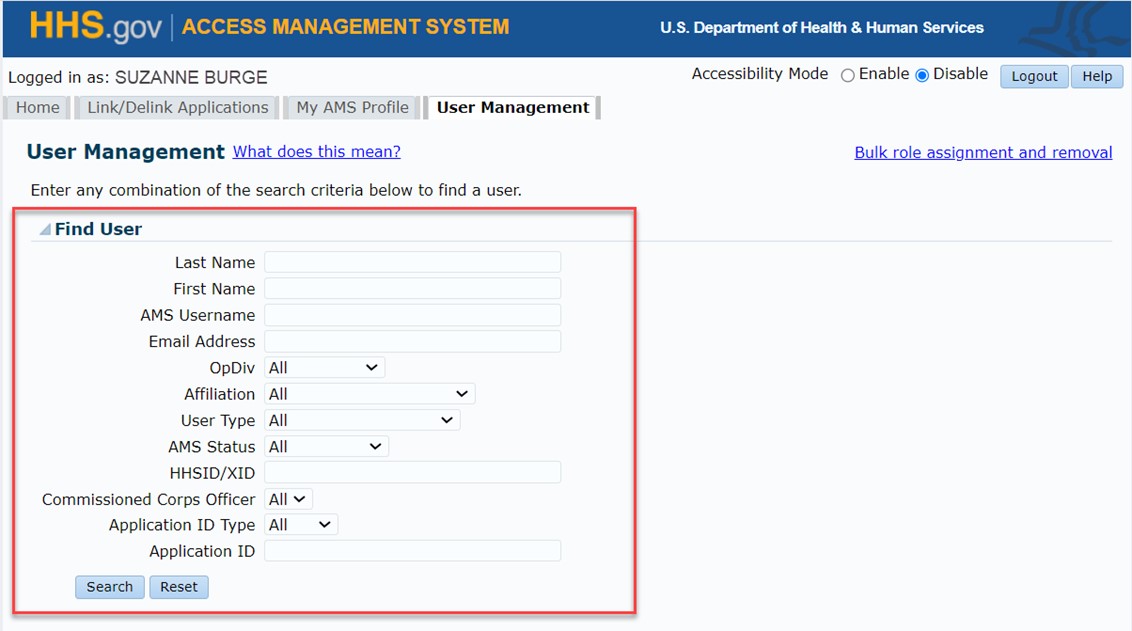
On the "User Management" page, enter your search criteria and click "Submit".
Note: You may enter any combination of valid search terms in the available fields, including partial expressions (e.g., first three letters of last name, first letter of first name, partial HHSID).
- Entries are not case sensitive
- Entering more information limits the number of matching records returned by your search (e.g., complete first and last name)
- Entering less information returns broader results (e.g., last name only)
- Entering a complete HHSID will return a single matching record
- Entering a complete AMS username may return more than one matching record
-
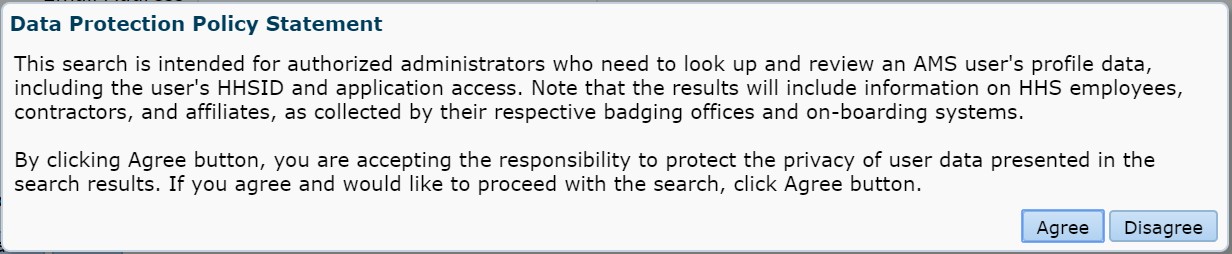
To proceed, click "Agree" on the "Data Protection Policy Statement" pop-up notice
-
Adding an Application Role
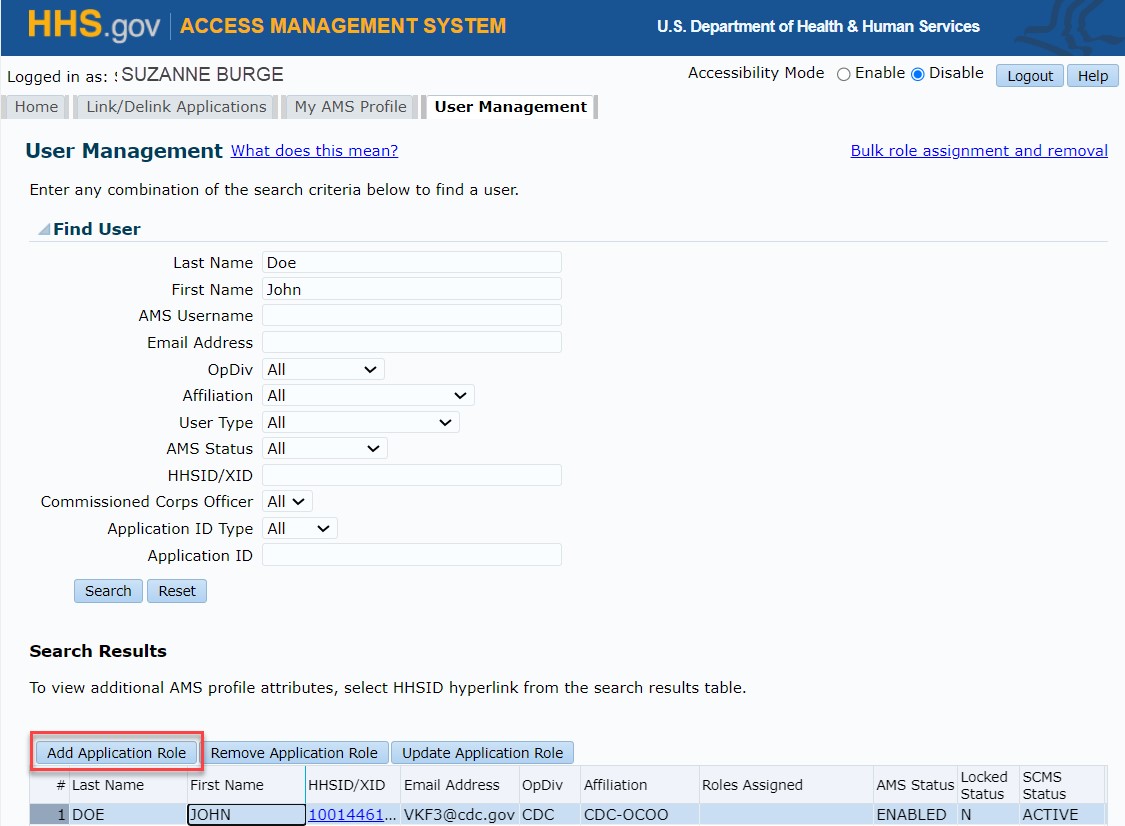
Highlight the desired record under the "Search Result" heading and click on the "Add Application Role" button.
Note: If you are performing an application role assignment service for an external user, set the User Type to "External".
Note: Select the HHSID/XID hyperlink next to the user's name to view additional user profile attributes in a pop-up window.
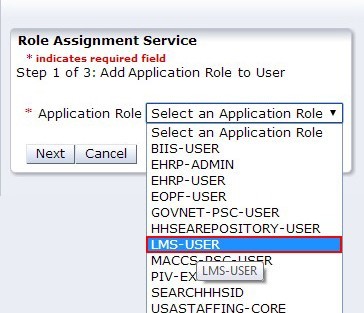
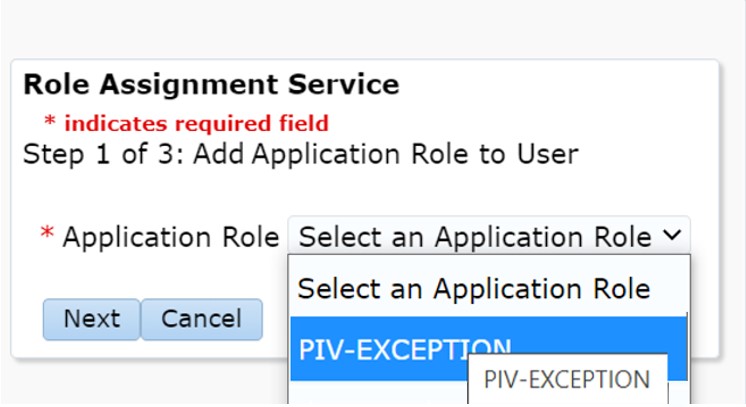
In the "Role Assignment Service" pop-up window, choose the desired application role from the drop-down menu.
Note: The drop-down menu will only include applications you are allowed to manage and which have not yet been added to the user's profile.
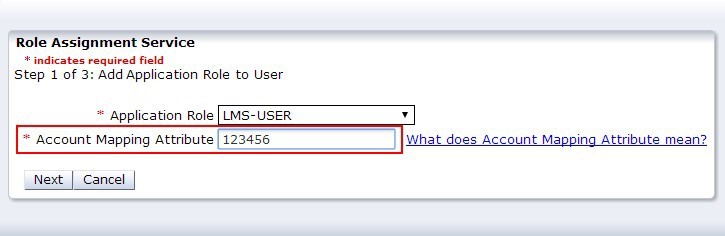
Some applications require an account mapping attribute to proceed. Unless the respective field appears and is prepopulated with the user's HHSID, you will need to enter the user's application username or whichever other attribute is used to uniquely identify the user's application account. It is critical that this information is an accurate match with the user for whom you are setting up the role.
If necessary, enter information in the "Account Mapping Attribute" field. Click on the "Next" button to advance to the next screen.
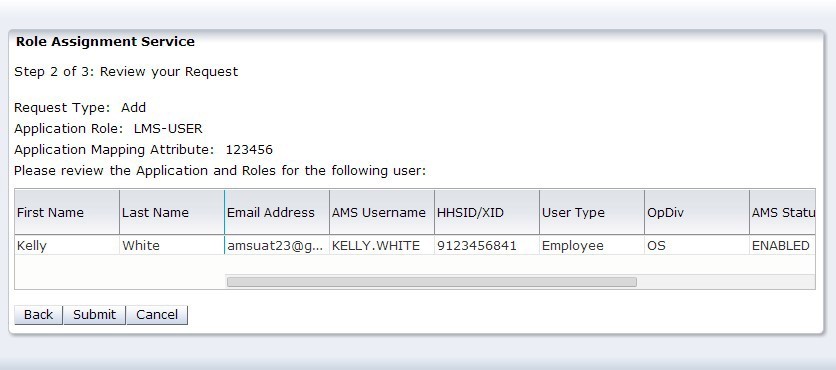
Review the request and click "Submit" if the information is accurate.
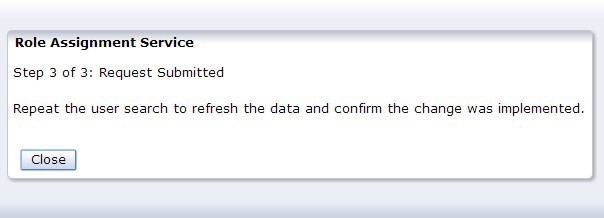
On the "Role Assignment Service" confirmation pop-up notice, click "Close" to complete the process and return to the "User Management" tab.
-
Removing an Application Role
Highlight the desired record under the "Search Result" heading and click on the "Remove Application Role" button.
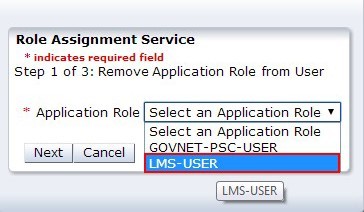
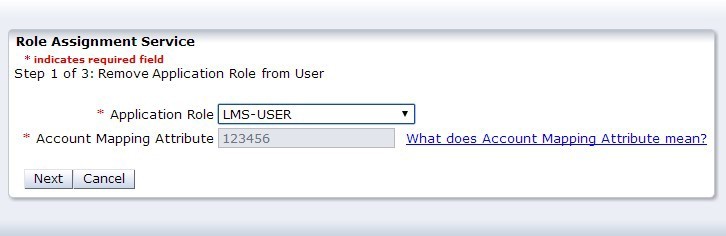
In the "Role Assignment Service" pop-up window, choose the desired application role from the drop-down menu.
Note: The drop-down menu will only include applications you are allowed to manage and which have been previously added to the user's profile.
Click on the "Next" button to advance to the next screen.
Review the request and click "Submit" if the information is accurate.
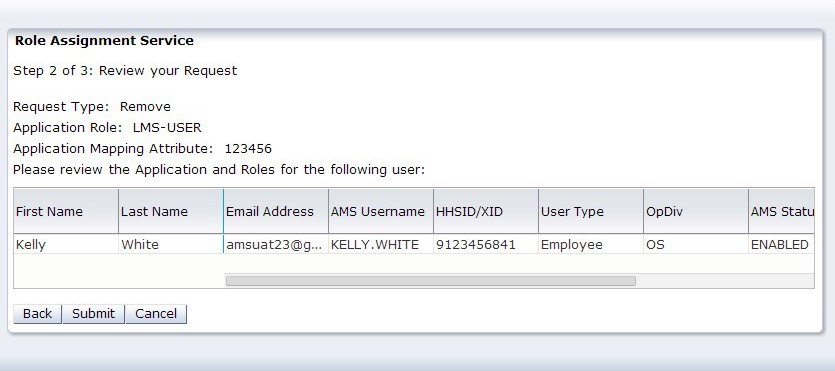
On the "Role Assignment Service" confirmation pop-up notice, click "Close" to complete the process and return to the "User Management" tab.

-
Updating an Application Role
Highlight the desired record under the "Search Result" heading and click on the "Update Application Role" button.
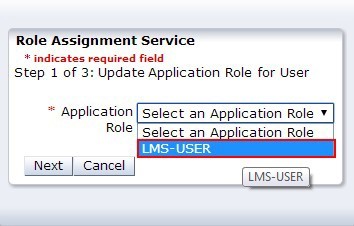
In the "Role Assignment Service" pop-up window, choose the desired application role from the drop-down menu.
Note: The drop-down menu will only include applications you are allowed to manage and which have not yet been added to the user's profile.
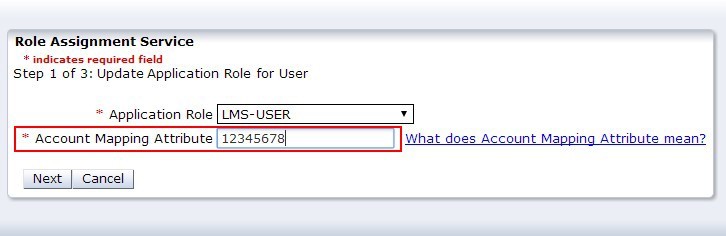
Some applications require an account mapping attribute to proceed. Unless the respective field appears and is prepopulated with the user's HHSID, you will need to enter the user's application username or whichever other attribute is used to uniquely identify the user's application account. It is critical that this information is an accurate match with the user for whom you are setting up the role.
If necessary, enter information in the "Account Mapping Attribute" field. Click on the "Next" button to advance to the next screen.
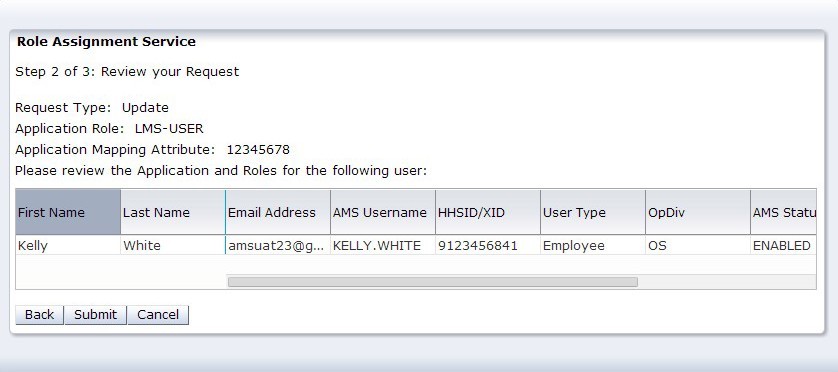
Review the request and click "Submit" if the information is accurate.
On the "Role Assignment Service" confirmation pop-up notice, click "Close" to complete the process and return to the "User Management" tab.
-
Bulk Role Provisioning
Bulk Role Provisioning allows role assigners to add or remove a single role for multiple users in AMS at once by uploading a .csv file of the users’ HHSIDs, as per instructions detailed in the Bulk role assignment and removal workflow under the User Management tab. If you do not yet have permission to perform role assignment services in AMS, you will need to complete the AMS Administrator Role Request Form for submission to IAMAMSPMO@hhs.gov for assignment. During an active AMS session (i.e., after logging into AMS), retrieve the form by clicking on the "Help" button on your homepage or directly copying this link into your navigation bar: https://ams.hhs.gov/amsApp/help/HelpIndex.html.
Performing role assignment tasks requires authentication with your HSPD-12 access card; if you logged into AMS by other means, you will be required to complete a second step of authentication before you can proceed with related activities.
Log into AMS using your HSPD-12 access card, at https://ams.hhs.gov (https://ams.hhs.gov).
On your AMS homepage, select the "User Management" tab.
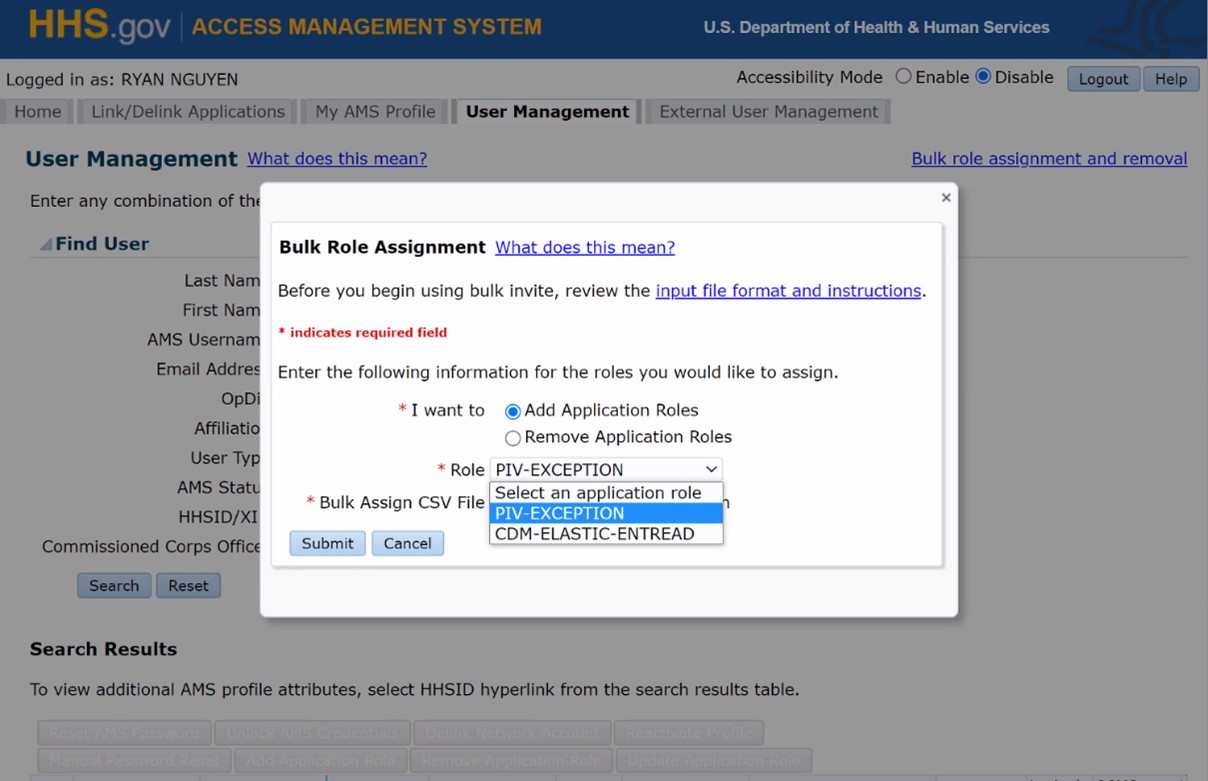
On the "User Management" page, click the "Bulk role assignment and removal" link.
Choose "Add Application Roles" or "Remove Application roles" radio button, select appropriate role from the drop-down, upload the CSV file and click Submit.
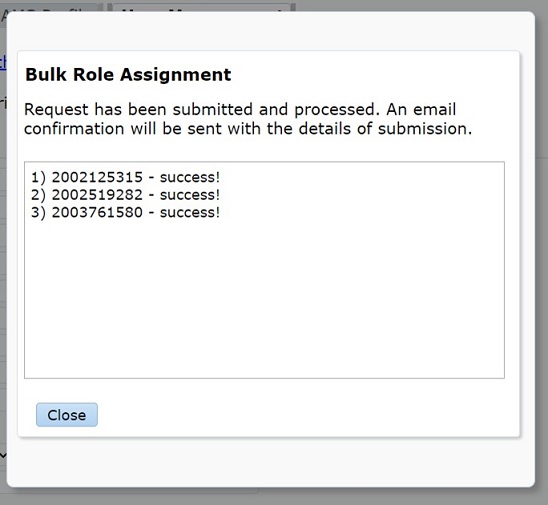
View confirmation message. A confirmation email will also be sent to the role assigner.
Notify appropriate users of role assignment (as necessary).
Note: An email notification is only sent to the role assigner. It is the role assigner’s responsibilities to notify individual users of role assignment or removal.
-
Adding/Updating/Removing the PIV-EXCEPTION Role
Adding the PIV-EXCEPTION Role
-
Highlight the desired record under the "Search Result" heading and click on the "Add Application Role" button.
Note: Select the HHSID/XID hyperlink next to the user's name to view additional user profile attributes in a pop-up window.
-
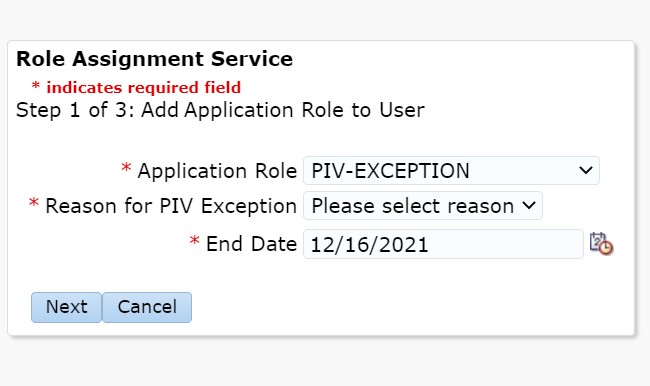
In the "Role Assignment Service" pop-up window, choose the "PIV-EXCEPTION" role from the drop-down menu.
Note: The drop-down menu will only include applications you are allowed to manage and which have not yet been added to the user's profile.
-
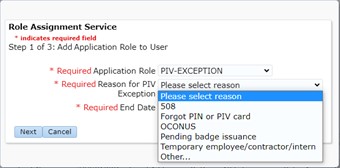
Select the reason for PIV Exception from the drop-down menu. If "Other..." is chosen, enter information in the "Justification for Other Reason" field. Then select the End Date for the PIV Exception by user the date picker.
Note: The allowable end date range is two years from the current date.
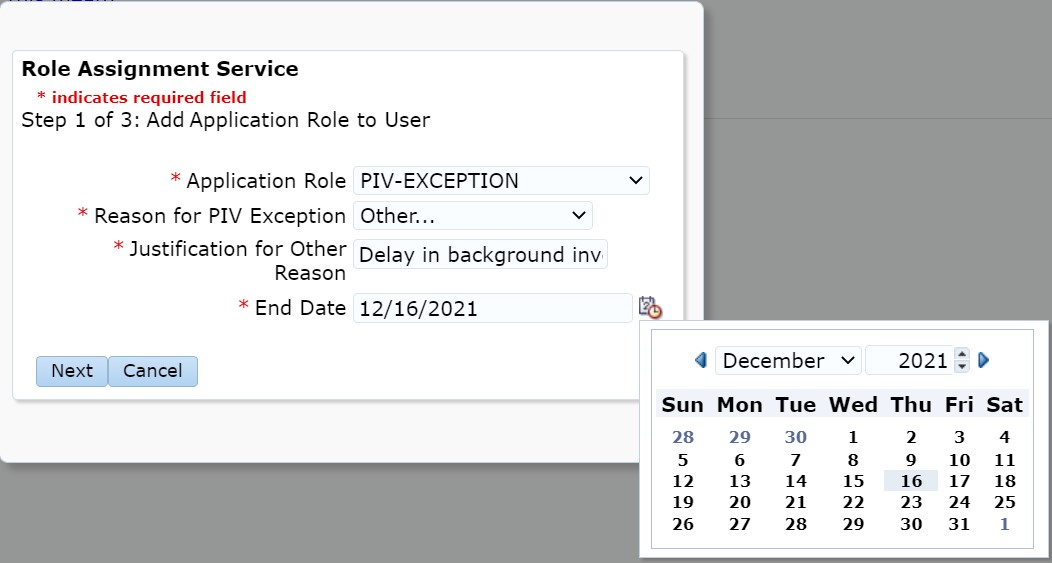
Click on the "Next" button to advance to the next screen.
-
Review the request and click "Submit" if the information is accurate.
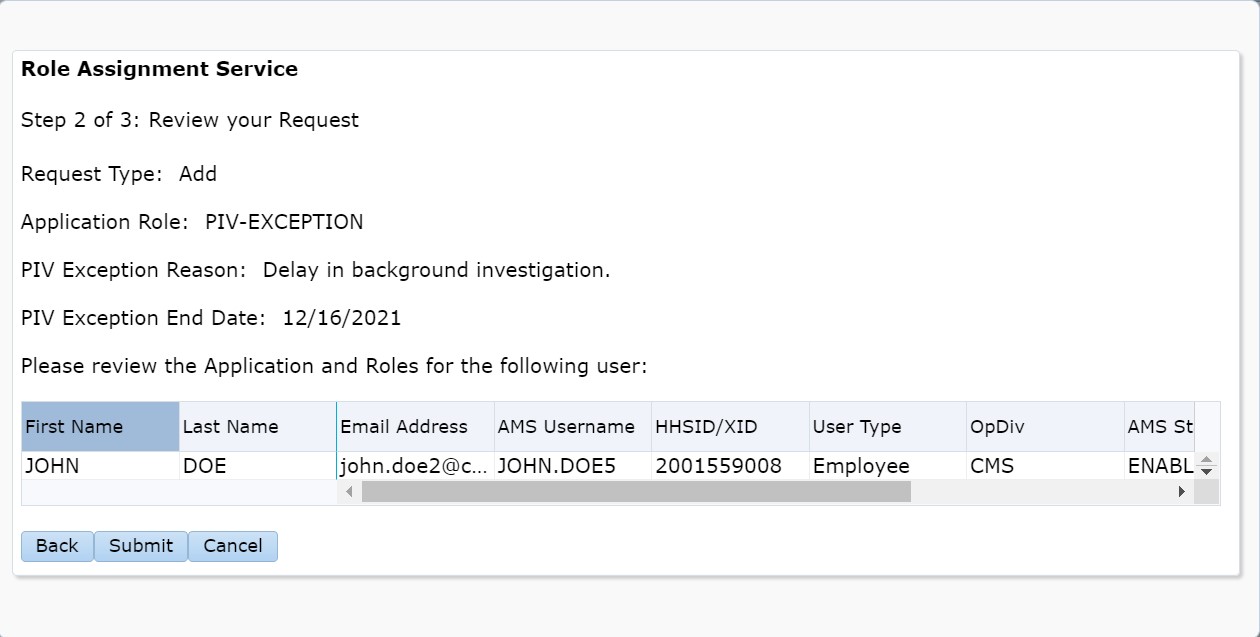
-
On the "Role Assignment Service" confirmation pop-up notice, click "Close" to complete the process and return to the "User Management" tab.
Removing the PIV-EXCEPTION Role
-
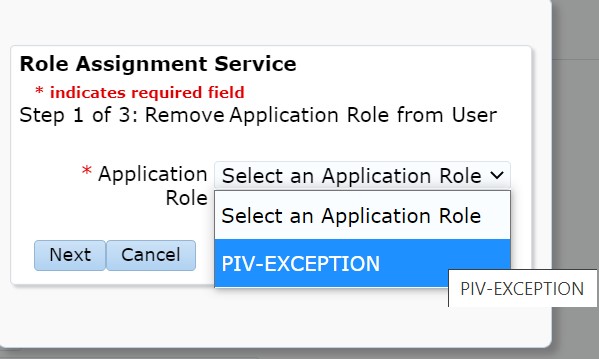
Highlight the desired record under the "Search Result" heading and click on the "Remove Application Role" button.
-
In the "Role Assignment Service" pop-up window, choose the "PIV-EXCEPTION" role from the drop-down menu.
-
Review the request and click "Submit" if the information is accurate.

-
On the "Role Assignment Service" confirmation pop-up notice, click "Close" to complete the process and return to the "User Management" tab.
Updating the PIV-EXCEPTION Role
-
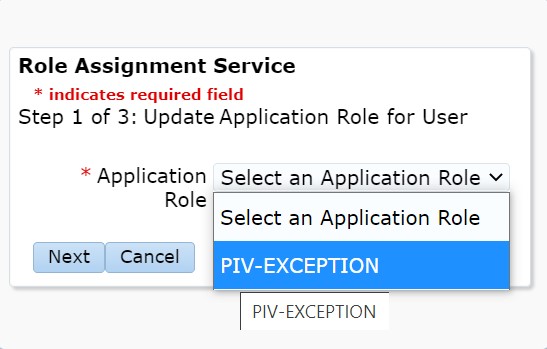
Highlight the desired record under the "Search Result" heading and click on the "Update Application Role" button.
-
In the "Role Assignment Service" pop-up window, choose the "PIV-EXCEPTION" role from the drop-down menu.
Note: The drop-down menu will only include applications you are allowed to manage and which have not yet been added to the user's profile.
-
Select the reason for PIV Exception from the drop-down menu. If "Other..." is chosen, enter information in the "Justification for Other Reason" field. Then select the End Date for the PIV Exception by using the date picker.
Note: The allowable end date range is two years from the current date.
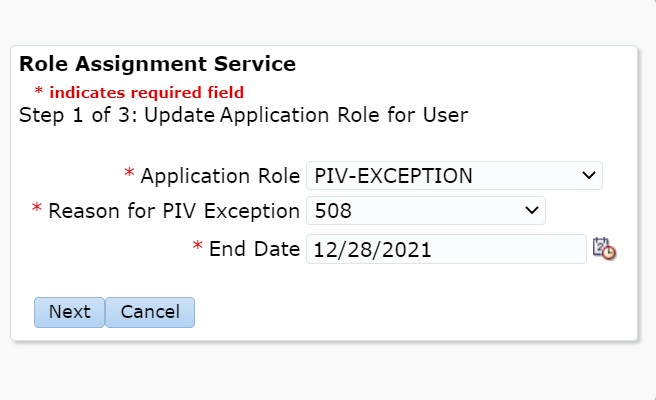
Click on the "Next" button to advance to the next screen
-
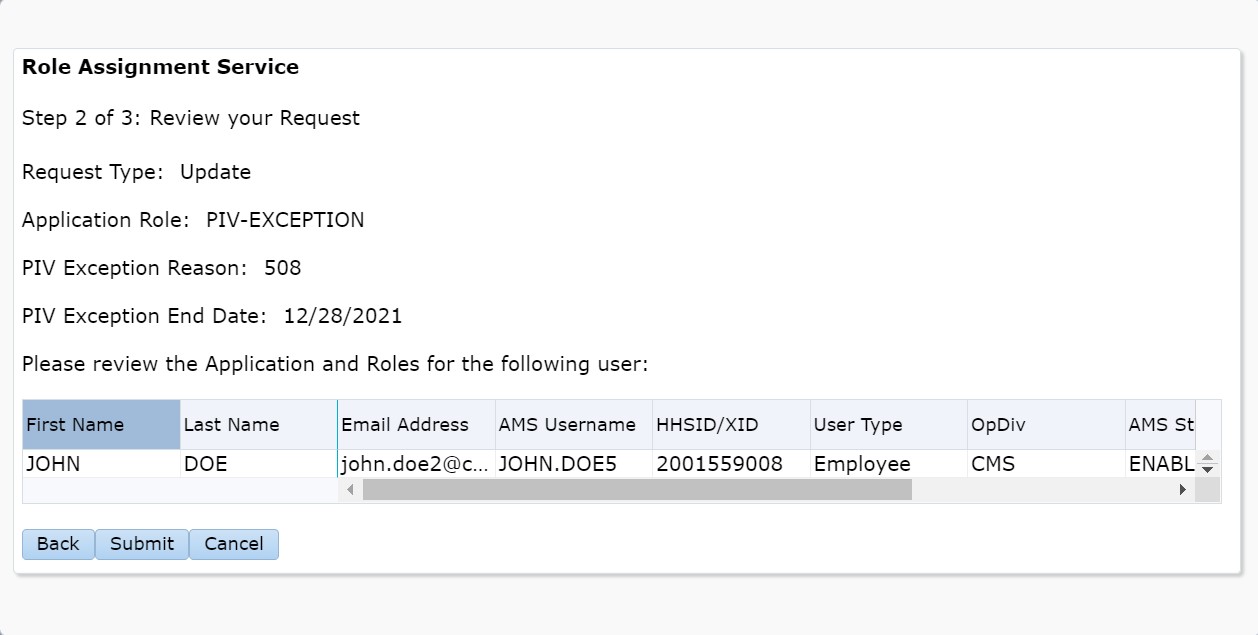
Review the request and click "Submit" if the information is accurate.
-
On the "Role Assignment Service" confirmation pop-up notice, click "Close" to complete the process and return to the "User Management" tab.
-
-