How to Manage an External User Profile
An external user is someone who is not a member of HHS staff and has a business need for access to one or more HHS applications protected by AMS. The external user must have an active HSPD-12 access card issued by another federal agency. Once an external user registers in AMS, a user profile is created in AMS with an end date that is valid for one year upon successful external user registration. The external user will be deactivated when the end date passes. The Supervisor and Approver associated with the external user are responsible for and have the ability to manage the external user lifecycle in AMS. Supervisor and Approvers should continually assess the need for active external users to access and manage the external user lifecycle accordingly –
- Terminate User: If a business need no longer exists, an external user should be terminated as soon as possible by completing the steps outlined in this document.
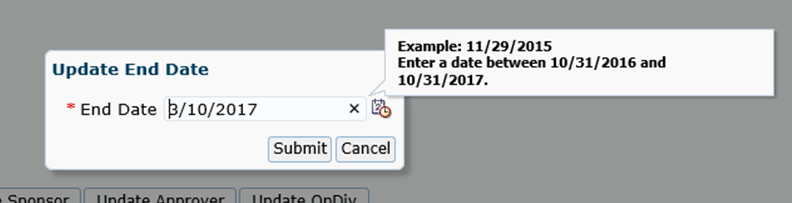
- Update End Date: If a business need continues to exist, an external user end date can be updated with a new end date. Note: The updated end date cannot exceed one (1) year from the current date.
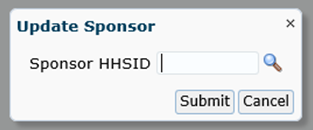
- Update Sponsor: If a new Sponsor needs to be assigned to manage the external user, the new Sponsor information can be updated using this feature.
- Update Approver: If a new Approver needs to be assigned to manage the external user, the new Approver information can be updated using this feature.
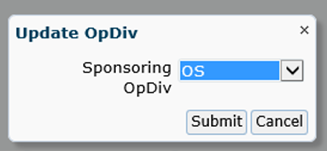
- Update OpDiv: This option will allow the Sponsor and the Approver to update the OpDiv affiliate for the external user.
An email notification is sent upon a successful submission of each request.
-
Log into AMS at https://ams.hhs.gov using your HHS HSPD-12 access card. For quick and easy access to your applications, add this page to your browser favorites or create a desktop shortcut.

-
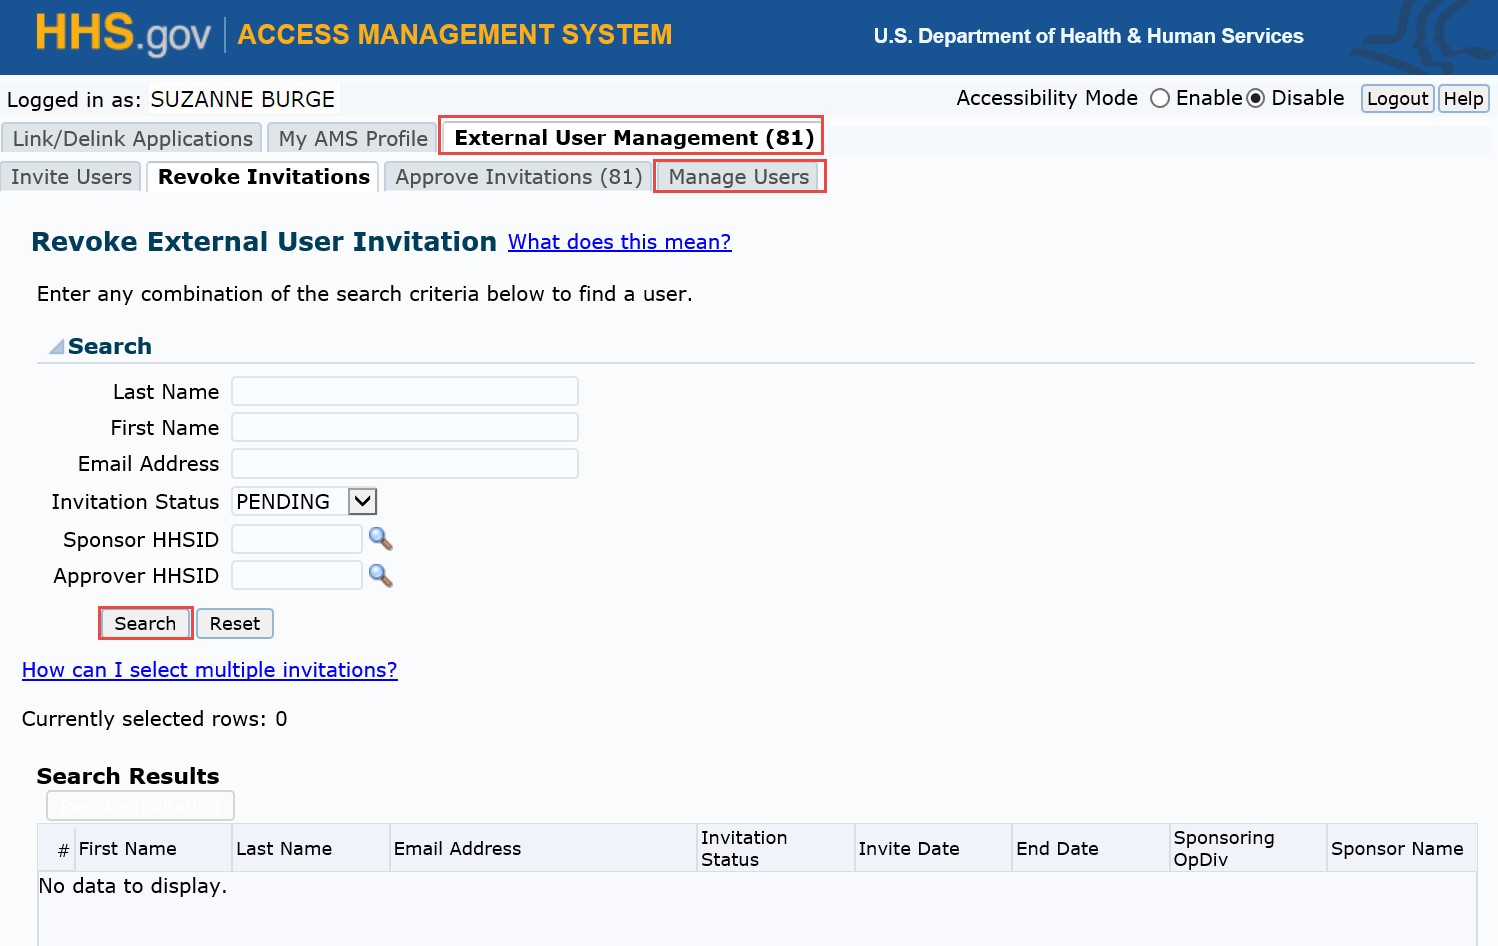
Select the "External User Management" tab, enter any combination of search criteria under the "Manage Users" tab, and click "Search" to look up the user. If your search results in a list of records, you will be able to filter them by clicking on the available column headers.
- On the "Data Protection Policy Statement" click "Agree" to confirm you are accepting responsibility to protect the privacy of user data.

-
Select the appropriate record and select the option that is applicable.

Bulk Manage External User Profiles: Select the appropriate record and select the option that is applicable.

-
To manage the external user, select the appropriate action button, then select "Submit" on the "Manage External Users" pop-up notice.

-
To complete the process and return to the "Manage Users" page, click "Continue" button on the confirmation pop-up notice.

-
To update external user end date for access, select the "Update End Date" button, then on the popup, enter the new end date. Note that the new end date should always be in the future and cannot be past one year from the current date. Select "Submit" button on the pop-up notice. To complete the process and return to the "Manage Users" page, click "Continue" button on the confirmation pop-up notice.

-
To update the Sponsor, select the "Update Sponsor" button, then on the popup, you can search for the new Sponsor by clicking the magnifying glass icon and entering search parameters. Select the Sponsor and click "Submit" button on the pop-up notice. To complete the process and return to the "Manage Users" page, click "Continue" button on the confirmation pop-up notice. Once submitted, the new Sponsor will be responsible for managing the external user lifecycle.

-
To update the Approver, select the "Update Approver" button, then on the popup, you can search for the new Approver by clicking the magnifying glass icon and entering search parameters. Select the Approver and click the "Submit" button on the pop-up notice. To complete the process and return to the "Manage Users" page, click "Continue" button on the confirmation pop-up notice. Once submitted, the new Approver will be responsible for managing the external user lifecycle.


-
To update the user's OpDiv affiliation, select the "Update OpDiv" button. On the popup select the new OpDiv from the dropdown and click "Submit" button. To complete the process and return to the "Manage Users" page, click "Continue" button on the confirmation pop-up notice. Once submitted, the updated OpDiv will be displayed. This helps establish an OpDiv affiliation for the external user.