ActivIdentity Certificate Update Instructions
The certificates will need to be updated because HHS has changed certificate providers from Verizon to Entrust and all users are required to receive a replacement digital certificate.
ALL Verizon digital certificates must be replaced by August 31, 2014.
1.0 ActivClient Automated Update Notification
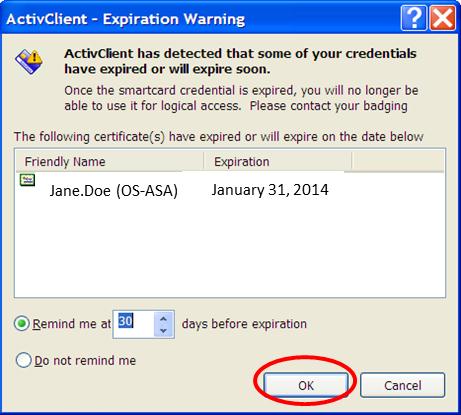
The ActivID ActivClient will provide an automated notification for when the time to update expired certificates occurs. This mechanism triggers the client to provide a "pop-up" screen that will inform the user that they have an updated certificate in the queue. Below are ActivClient screenshots. You will see a pop-up window on your screen as shown below. Figure 1 illustrates the Windows XP version of the pop-up and Figure 2 illustrates the pop-up as displayed by Windows 7.
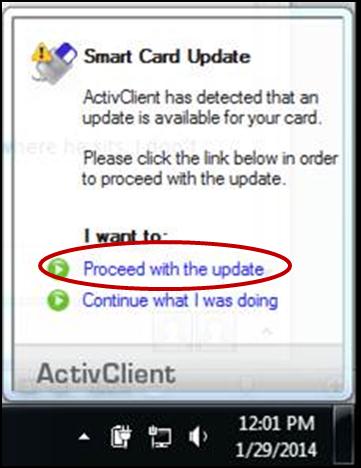
Proceed with the automated update by choosing either of the selections as indicated above. This acknowledgment to proceed with automated update procedure will generate the update process by linking you to the ActivID "My Digital ID Card (MDIDC)" Update server, and will respond by displaying the following screen as shown in Figure 3.
NOTE: Please adhere to these instructions carefully - DO NOT remove your PIV badge from the card reader until the update is completed. Removing the card while the update is in progress will have adverse reactions to the certificate update process, and will require a trip to the Physical Security Badging Office to rectify the error.
- Warning: It is highly recommended that you perform the certificate update while physically connected to the ITIO Network.
- If you must perform the certificate update while connected to Virtual Private Network (VPN) - YOU MUST PERFORM THESE STEPS to ensure you can log into your computer with the new certificate.
- Before disconnecting from VPN, you must Lock your computer screen and unlock the
screen with your PIV badge with the new certificate. If you do not do this step, you will
need to be connected to the HHS network the next time you reboot your system.
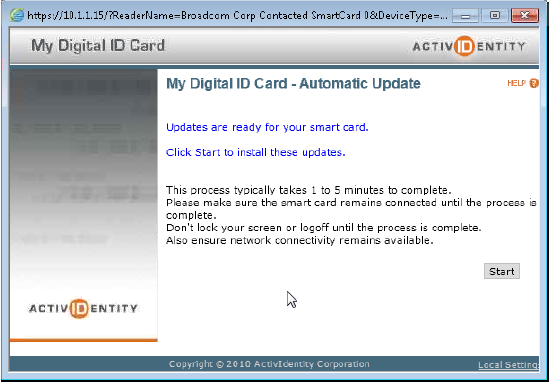
 Figure 3 - MDIDC Reading Card Window
MDIDC reads the PIV badge and displays a window informing the user that updates are available. Click the Start button to begin the card update process pictured in Figure 4.
After clicking the Start button, MDIDC prompts the user to enter a PIN for identification purposes pictured in Figure 5.
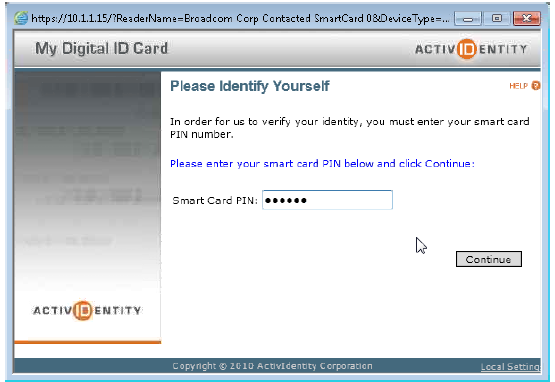
After entering the correct PIN and clicking the Continue button, MDIDC begins the card update process. MDIDC will display a window with a progress bar indicating the update is progressing pictured in Figure 6.
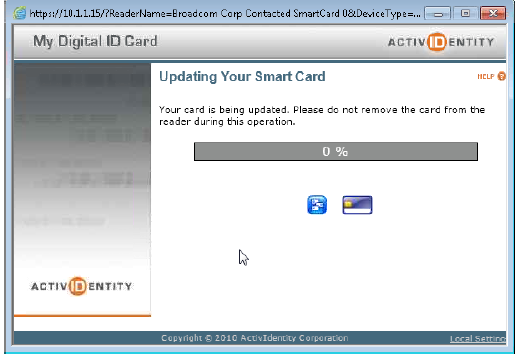
NOTE: When the card update process is running, the user should make sure that they:
- Do not use the card for operations (such as email signature). These card requests will be automatically be blocked until the card update process is complete.
- Do not lock the screen or logoff until the process is complete.
- Do not remove the card until the process is complete.
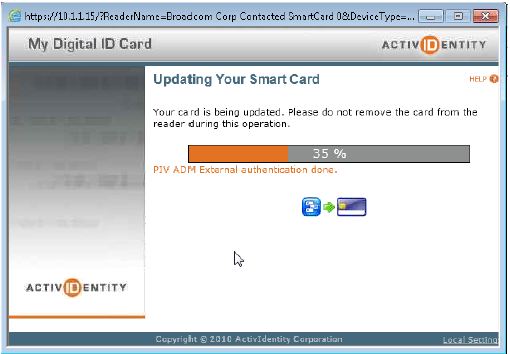
The following screen image pictured in Figure 7 shows the card update progress at 35% completion.
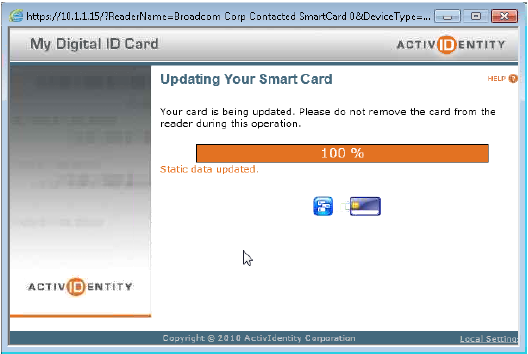
The following screen image pictured in Figure 8 shows the card update progress at 100% completion.
Once the card update process is completed, MDIDC will display a message that the card was successfully updated and will notify the user to click on the "Done" button to close the MDIDC window pictured in Figure 9.
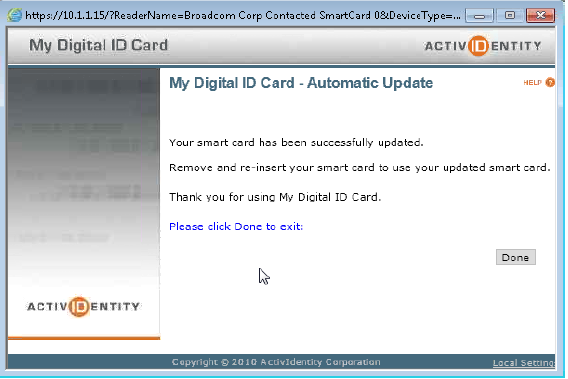
Click Done to close the MDIDC portal page.
When the card update is complete, MDIDC informs the user that he should remove and re-insert the card in order to use it. This operation guarantees that all ActivClient and Windows components are aware of the new credentials present on the card. For example, if the Windows Logon certificate is updated, removing and reinserting the card publishes the new certificate to the Windows CAPI store, a requirement for a successful Windows Logon.
NOTE: On your next logon you will be prompted to enter your PIN to publish your new certificates to the GALGlobal Access List (see Section 3.0).
2.0 Smart Card Auto-Update Testing
The ActivClient will display a pop-up to automatically notify users to update their certificate, which will remain on screen for 30 second intervals until the user acknowledges the notification by selecting "OK" to proceed with the update, or by selecting "Cancel" to terminate the notification. Choosing to cancel, or terminate the notification, triggers a new cycle to display a new notification with the next 30 day interval. At which time, the user will have another attempt to update the expiring certificate. However, the ActivClient provides a method to "Check For A Card Update" at any time.
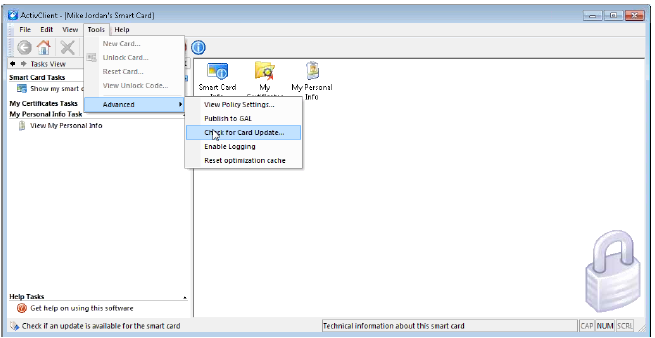
To manually check for a card update--open the ActivClient User Console, and choose "Tools" from the menu bar. Scroll down the menu, and the select "Check for Card Update" as pictured in Figure 10.
NOTE: If the software has not been updated, and you do not see the screen displayed in Figure 1 and you should contact the ITIO Service Desk for support.
ActivClient will query the CMS server for card updates. If a card update is detected, a prompt is displayed pictured in Figure 11.
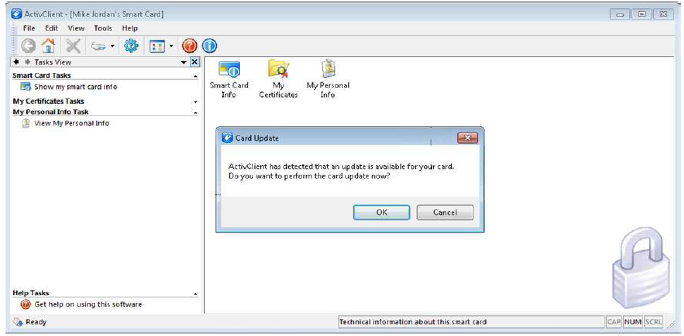
After clicking the OK button, ActivClient launches the My Digital ID Card (MDIDC) user portal to begin the card update process pictured in Figure 3, and follow the screen prompts to complete the manual update process.
3.0 What To Do After Updating Certificates
Because you just updated the digital certificate on your PIV badge, your old certificate is no longer valid. Applications that require authentication like encrypting, and digitally signing email, or connecting to the VPN, will require your new certificate to "re-authenticate". This will require introducing your new certificate to the system.
The following instructions will describe a step-by-step process to introduce your new certificate, and clean up your old certificates.
After you have successfully updated your certificates, you will need to log off, then log back on with your PIV badge. Upon logging in, ActivClient will inform you that you need to "Publish Your Certificate to the GAL". Click on the "OK" button, and your certificate will automatically publish to the GAL.
For detailed instructions on how to publish your certificates to the GAL using Microsoft Outlook are located on the ITIO Portal \IT Projects\ HHS-ITIO PIV Badge - For Your Information
Updating your certificates can be performed remotely using the VPN—after updating your certificate remote, you will need to log back in to the system using the VPN. To log in remotely, you will need to present the correct certificate to VPN for authentication purposes. While logging in to the VPN, you will need to select the correct certificate from the certificate store - follow the instructions provided here to select the correct certificate to use with the Check Point VPN software. detailed instructions on how to publish your certificates to the GAL using Microsoft Outlook are located on the ITIO Portal \IT Projects\ HHS-ITIO PIV Badge - For Your Information
For detailed instructions on how to select the correct certificate for use with the Check Point VPN, are located on the ITIO Portal \IT Projects\ HHS-ITIO PIV Badge - For Your Information
Your old digital certificates (prior to update) will no longer be useful, and could cause problems when you use your PIV badge to log into your computer, encrypt, or digitally sign email and other documents. Therefore, these old certificates should be removed (deleted) from your computer.
For detailed instructions on how to remove old certificates from your computer, are located on the ITIO Portal \IT Projects\ HHS-ITIO PIV Badge - For Your Information
If you have questions or experience technical problems following the deployment, please send an email to HHS_ITIO_Service_Desk@hhs.gov, or you may contact the ITIO Service Desk for any technical issues at 1-866-699-4872.